Getting Started - Opera GX Extensions
This guide will help you set up your development environment and prepare you for creating extensions for Opera GX using Manifest V3.
Welcome to the world of Opera GX Extensions! This guide will help you set up your environment and create your first extension.
Prerequisites
Before you begin, make sure you have the following:
- Opera GX Browser: Download and install from Opera GX.
- Code Editor: A text editor or IDE (we recommend Visual Studio Code.
- Basic Knowledge: Familiarity with JavaScript, HTML, and CSS.
Setting Up Your Development Environment
Install Opera GX
If you haven't already, download and install Opera GX from the official website.
Opera Gx | Gaming Browser
Enable Developer Mode
- Open Opera GX and go to the extensions page by typing
opera://extensionsin the address bar. - Toggle on the "Developer mode" switch in the top right corner.
Set Up a Workspace
- Create a new directory on your computer for your extension project.
mkdir gx-extension-name
cd gx-extension-name
- Inside this directory, create a file named
manifest.json. This file is crucial as it contains important information about your extension.
Set Up Version Control (Optional but Recommended)
- Initialize a Git repository in your project directory:
git init
- Create a
.gitignorefile to exclude unnecessary files from version control.
Your First Extension
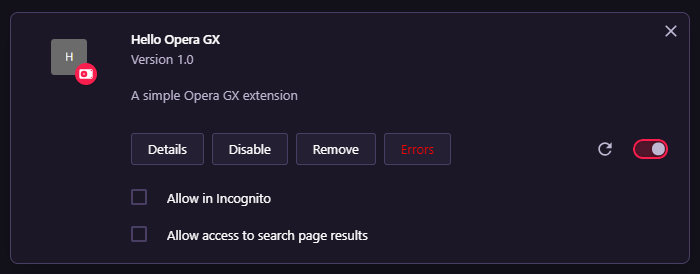
Let's create a simple "Hello, Opera GX!" extension using Manifest V3 to get you started.
Create the following files in your extension directory:
manifest.jsonpopup.htmlpopup.js
Add the following content to manifest.json:
{
  "manifest_version": 3,
  "name": "Hello Opera GX",
  "version": "1.0",
  "description": "A simple Opera GX extension",
  "action": {
    "default_popup": "popup.html"
  },
  "permissions": []
}
Add the following content to popup.html:
<!DOCTYPE html>
<html>
<head>
  <title>Hello Opera GX</title>
</head>
<body>
  <h1>Hello, Opera GX!</h1>
  <script src="popup.js"></script>
</body>
</html>
Add the following content to popup.js:
console.log('Hello from the Opera GX extension!');
Load your extension:
- Go to the Opera GX extensions page (
opera://extensions) - Click on "Load unpacked" and select your extension directory

Congratulations! You've created your first Opera GX extension using Manifest V3. You should see a new icon in your browser toolbar. Click it to see your "Hello, Opera GX!" message.
Key Differences in Manifest V3
Manifest V3 introduces several changes from V2. Here are some key differences:
- The
manifest_versionis now set to3. browser_actionis replaced withaction.- Background pages are replaced with service workers.
- Content security policies are more strict by default.
- Some APIs have changed or been replaced.
If you're migrating an existing extension from V2 to V3, you'll need to make several changes. Refer to the Manifest V3 Migration Guide for detailed information.
Next Steps
Now that you have your development environment set up and have created a basic extension using Manifest V3, you're ready to dive deeper into Opera GX extension development. Check out the Key Concepts of Extensions to learn more about the core components and APIs you'll be working with.
Remember, the key to successful extension development is experimentation and continuous learning. Don't hesitate to explore the Opera GX documentation and try out different features as you build your extensions.
Please support us by disabling your ad blocker.
